Friday, December 31, 2010

GOODBYE 2010 .... HELLO 2011

... and I say this with great relief. 2010 has been a year I wish never to repeat again. It's been marked by much ..... insecurity, unemployment, betrayl, and a big dose of worry!!! However it has not been all bad ... we learned who our real friends were, we got to visit our families over the summer, I finally got to kiss and cuddle my little niece, and over this holiday season, we have been truly blessed by the kindness and generosity shown to us by people we do not even know.

As 2011 dawns, it's full of hope and promise - a clean slate.I wish only wonderful things for you and your families - health, happiness and prosperity.

Girl Child will be going to her first New Years Eve party tonight - a sleepover at her best friends house. I offered to send a little something to ring in the New Year. Girl Child and I decided to make some cake pops (my inspiration was the cutest, most gorgeous creations made by Bakarella!!!) - they turned out so cute. There'll be a plate of chocolate dipped strawberries accompanying them!!!!

See you in 2011, sweet bloggy friends!!!

Sunday, December 26, 2010

THE MOST WONDERFUL TIME OF THE YEAR...

Wow, it's hard to believe that Christmas has come and gone!!! We now look toward the New Year ..... praying that it's a happier year than 2010 was. The thing I love most about the dawning of a New Year, is that it's full of promise and hope.
We had a lovely day yesterday, just enjoying each other ... good food, good company, and memories made:-)

As I've mentioned a number of times throughout the year, I took part in a year long Year of Enchantment Swap - it was an absolute blast. I was over joyed when Val (our lovely host), decided to host YOE 2:-) As a result of this swap, I decided to make our Christmas table centerpiece an enchanted one. Here is the result ...

I loved it, especially the use of non traditional colors. I found the cute little gnome ornaments on sale at Cracker Barrel for 50c a piece. I bought a few, knowing that I could use them later to make some more super cute pin cushions.
I hope you all had a fantastic Christmas, and that 2011 brings you all your hearts desire.

Monday, December 20, 2010

CHRISTMAS CRAYONS...

There are tons of tutorials for making these wax crayons all over blogland. They were a lot of fun to make (ok, so the paper peeling part was a bit laborious!!!). So much fun infact, that I made a bunch for our Church Preschool Christmas Shop.
These Christmas trees are for my favorite niece, as part of her Christmas present. Before you think I'm an ugly aunt who plays favorites .... I only have one niece, the rest are nephews who both share the number one nephew spot!!!

I like the way that they look marbled - I found that the crayon looked more marbled if I left the crayons in bigger pieces as opposed to smaller ones. My molds (Christmas tree and snowflake) were from the dollar section of Target, and I put mine in a 250 deg F oven, and it took about 20 mins for the crayons to melt completely.

These would make a quick and easy, last minute Christmas gift. My 10 year old even said he'd like some ..... I was quite pleasantly suprised by that:-)

Sunday, December 19, 2010

TEACHERS GIFTS ...

Well school is out and we have 2 lovely weeks to enjoy just being together:-)
I did need to take care of teachers Christmas gifts though, before we got out - this year the number of gifts needed was greatly reduced due to the fact that Girl Child moved across to Middle School. This gave me a little extra time to put them together ..... although I did leave it until the day before .... let's just say that I work better under pressure!!!
I had a new Simplicity apron pattern (don't you just LOVE the Hobby Lobby 99c pattern sales!!!) I wanted to try, so aprons it was. I love this pattern, and it may have just become my new favorite apron pattern - quick and easy, but still pretty.

This was one. I liked the fabric because it reminded me a lot of Vera Bradley, without the Vera Bradley price tag:-)

This one is a classic black and white - I think those 2 colors are so elegant together.

Then just a few days prior to making them, I had read a blog, where they talked about finding alternative, more eco friendly ways to wrap up Christmas gifts - this got me thinking. They suggested reusable shopping bags. I had some dish towels I bought at the after Christmas sales last year, so that's what I used. I just added ribbon and a snowflake tag cut from felt, and voila, I had a 100% usable gift. I even used safety pins in place of tape.

It's down to the last few days now, to get all those last minute Christmas gifts finished. We have knitting needles flying and the sewing machine whirring furiously in this house!!!!Enjoy your last minute crafting - it shouldn't be stressful, just a whole bunch of fun!!!

Tuesday, December 14, 2010

DOUBLE CHIP COOKIES - YUM!!!

This is a bit of a break from the norm for me - but these cookies were too good not to share with you. I don't know where the recipe comes from as it was written on a piece of paper. If I had to guess, I'd say it was most likely from a Taste of Home magazine, or something similar.

It was our Church Middle School Christmas Banquet tonight (wow, there's nothing like a bunch of dressed up middle schoolers to make you realize just how quickly they grow up!!!). I signed up to bring a dessert, and Girl Childs' choice was chocolate chip cookies. Let me just say now, I'm ordinarily not a cookie baker - I'll bake anything before I bake cookies!!!

THE RECIPE
- 2 cups semi sweet choc chips
- 1 stick butter
- 3 eggs
- 1/2 cup sugar
- 2 teaspoons vanilla extract
- 11/2 cups all purpose flour
- 1 teaspoon baking soda
- 1/2 teaspoon salt
- 10 oz white choc chips

LETS GET BUSY MAKING THESE BABIES....

(1) Melt butter and choc chips (semi sweet) together until smooth
(2) Allow to cool for 10 mins
(3) Beat eggs, sugar and vanilla until light
(4) Add chocolate mixture to egg mixture - mix well
(5) Combine flour, baking soda and salt together
(6) Gradually add to creamed mixture
(7) Stir in white chocolate chips
(8) Drop rounded teaspoonfuls onto lined baking sheet
(9) Bake for 10mins at 350 deg F

YUMMY!!!!

Just remembered, I do have something crafty to show you .... another pin cushion I've made. This one is a thank you gift for someone.

Then lastly, because, when I see her all dressed up like this I am reminded of just how proud she makes her daddy and I - a picture of Girl Child all dressed up for the banquet tonight:-)

Happy Crafting Everyone!!!!

Friday, December 10, 2010

QUICK GIFT IDEAS...

This will prove that I have been constructively busy ..... not just busy playing elf:-)
I have 2 quick gift ideas to show you. These were actually made as part of 2 different swaps, but they'd work well for teacher or neighbor gifts. Both took less than an hour each to make, and they both used items I had on hand. So, when it gets to 9pm on Christmas Eve, and you remember the one person you forgot, perhaps these ideas may come in useful!!!!

This is a Christmas Mug Rug - big enough to fit a nice cup of hot chocolate and 2 sugar cookies on - yummy!!! Speaking of which, I'm attending my 1st ever cookie exchange tomorrow - I'll be spending today baking and decorating 3 dozen gingerbread men .... or maybe the chocolate chip espresso meringues sound better ..... hmmm, decisions!!!


I got the idea for this pincushion (and the few similar ones I've made) from Elizabeths blog (Creative Breathing). If you haven't visited her blog, you're missing out, it is pure eye candy!!!It is 2 basic 6" circles of fabric sewn together, that I then embellished. I love them, and could have one for every holiday:-)

Elf antics ... well ....

They got into the fridge and made jello the other night - thanks guys for dessert!!! It must have been very chilly in there for them. Boy Child did point out to me however that they'd be used to the cold given they live in the North Pole - that kiddo is so logical at times:-)

Then this morning we found them "swimming". A tub full of fluffy cottonballs - the pool, my mini ironing board - the diving board, red facecloths - their towels and 2 very responsible life guards.
To the kitchen I go ..... until next time!!!

Tuesday, December 7, 2010

ELF MAGIC....

There's certainly been a whole lot of that around this house lately!!!
So what exactly have those naughty things been up to.... well....

They had a night of sleddimg down the stairs (the sled was actually the plastic containers we wash dishes in when we go camping).

They had family game night last night - they played Tic Tac Toe, and colored a picture. Boy Child did decide however that their coloring had improved since last year:-) Note the little Christmas tree - he also decided at Lowes yesterday, that they needed their own Christmas tree!!!

They decided to picinc on my chandelier ..... crumbs and all!!! When will they learn that heights like this are just too dangerous for little things like them!!!!

Like all good elves should, they had some tub time .... in my washing machine!!! I must say though, those mentor elves are pretty responsible - those babies were wrapped all nice a warm when we found them in the morning:-)

There has been some Christmas crafting going on here - I promise.

I've had a few last swap packages I've had to get out - pictures will follow. I also need to take pictures of the Advent Calendars ..... that will be todays chore:-)

Wednesday, December 1, 2010

DECEMBER 1ST...

And this day heralds the arrival of our 2 mischevious guests - Gabby and Bart. They arrived in suitcases (or lunchboxes as Boy Child explained to me), with their mentors (who are just as naughty, I might add),sometime during the night last night!!! One very excited child was awake at 5am this morning, to welcome them back .... the other child was slightly put out by the early wakeup call:-)
So we welcome back our 2 little elves..... let's see what havoc they can think up this year!!!


December 1st also marks the beginning of our nightly family Advent activities. As we have a guest staying with us at the moment, we kept tonight simple - hot chocolate and cookies just before bed!!!

The hot chocolate had all the trimmings - it was topped with whipped cream and sprinkles and a candy cane to stir it with. Notice the little plates - they are a Hobby Lobby find - oh so cute, and big enough to fit just one cookie on:-) A side note ... it is quite chilly here in Texas now, despite my shirtless child - he just hates sleeping with a shirt on!!!

I eventually got around to making the kids Advent Calendars this year - after changing my mind a hundred times on what I wanted to do. I will show them to you tomorrow.... they turned out to be very cute, and the kids liked them a lot!!!

Hope you're keeping warm wherever you are ..... oh, how I love this time of the year!!!!

Sunday, November 28, 2010

STYROFOAM BALLS + PAPER CLAY =

This little guy!!!

Remember in my last post, I mentioned that I'd been playing around with paper clay - well this frosty snowman is the result. The paper clay was easy to work with and adhered really well to the styrofoam balls. It did take longer to dry than the label said, but once dry it is rock hard.I painted him, glittered him, varnished him (to stop the glitter falling off!!!), and finally I dressed him with a fluffy neck warmer, some bling, and a top hat:-)

I really like the way he turned out. Boy child asked if I'd make 4 (this one is a gift), so that we could each decorate one as one of our Advent activities this year - that way we could have a snow family!!! I like the idea, and will be getting to them soon.

Hope your Thanksgiving was wonderful - ours certainly was. Christmas crafting and gift making is in full swing now..... I need to get the kids Advent calendars done - 2 days left, and counting!!!

Tuesday, November 23, 2010

I HAVE BEEN BUSY....

I just haven't posted about it.
I bought a new camera with a giftcard I won, and until 10 minutes ago hadn't worked out how to download the pictures onto the computer ..... problem solved however, I've done it:-)


I made my deer ornaments for Novembers leg of our YOE Swap - I wont share those just yet though, as I haven't had confirmation that my partner has recieved her package yet. This year long swap wraps up next month - the time sure has flown!!! It's been a wonderful swap and I've "met" some great ladies. The cherry on the top - I have a whole lot of handmade, enchanted ornaments that will grace an enchanted tree - it's going to be beautiful!!!


Every enchanted tree needs an enchanted tree skirt - well that's my thought anyway. So here it is.... It came together as I worked on it, no definate plan in mind when I started it .......... I love it!!!

All of the images (besides the owl) I either drew or got from kids coloring books. The owl is an adaption of the scissor keep I've posted about before.


Next .... an apron for a friends birthday. I love this pattern - quick, easy and very cocktailish!!!
Her birthday also marks the beginning of Key Lime Bark making season for me - she loves it, so I always try to include some in her birthday gift. It gets included in every candy and cookie tin I give out over Christmas ........ so yummy!!!

I played with some styrofoam balls and paper clay today ..... that was so much fun!!! It's now drying, so hopefully within the next few days I can show you the results of that little adventure!!!

To all our American friends - Happy Thanksgiving!!!!

Monday, November 15, 2010

BIRTHDAY CAKE BONANZA

Boy Child, and his two closest friends (who happen to be twins) have birthdays that are two days apart. All three are passionate little soccer players, so this year they shared a combined soccer themed birthday party.

As the moms, it was one of the easiest (if not, the easiest) parties either of us have ever hosted. 17 boys on a soccer field playing soccer. 2 dads playing goal keepers (and referees!!!). Pizza delivery. Birthday cake.
The cakes were my responsibility..... and I was very happy with how they turned out:-)

Each of the boys got to choose the flavor cake they wanted - Red Velvet, Vanilla and Strawberry!!! Then I did the rest.

They ended the party with a marshmallow war!!! Their party favors were marshmallow guns (made using plumbing supplies), and a bag of mini marshmallows:-)

Happy Birthday Boys!!!

Friday, November 12, 2010

OH SO PRETTY ....

Ok, looks like we're back in action!!!

There is something about the cooler weather - we can't call it cold here in Texas yet, and by the way I am very jealous of those of you who have snow already ...... I so wish it was us:-) - that makes me want to curl up on the couch with some knitting needles and soft, chunky yarn!!! A yummy Cinnamon Dolche Latte steaming beside me, and we're pretty close to Utopia!!!
That's exactly what I did the other day, and this was the result...

A chunky, cabled scarflette. The pattern (The Breckenridge Cowl) is from French Press Knits (that girl is one VERY talented designer). It used size 15 needles and only 1 ball of super chunky yarn. It only took me a couple of hours to make. It is so snuggly and warm, and looks really cute when worn with a jacket. I love that you can use any big buttons you like - the possibilities are endless.

There will most definately be more of these under some Christmas trees this year:-}
Off to Friday morning movies with the girls now.

Happy Crafting...

Tuesday, November 9, 2010

THE COMPUTER IS SICK .... VERY SICK!!!

Hi everyone .....
The title says it all ...... ugghhh. As soon as I am able to download pictures onto hubby's computer, I'll be back in the land of blog:-)
I have some things of the yarnny, fabricy variety to share with you.
It really hasn't been our year for computers!!!

Until then - I hope your getting some Christmas crafting done.

Wednesday, October 27, 2010

HAUNTED HALLOWEEN HOUSE...

On my last visit to Hobby Lobby .... to get school project goodies for Girl Child .... I walked past the last few, lonely looking, greatly reduced in price, Halloween craft leftovers. There, right at the back I found one of those plywood, spooky looking houses. I also found some painted, plywood Halloween stickers. The house's price tag - $3-99 less 60%, and the stickers were $1-99, less 60% - you can't pass up a deal that good!!!!

I brought it home, and over the past 2 days have turned it into this ...

I painted it, then glittered the entire house with some very coarse glitter. I gave it 3 coats of spray on sealant to stop that glitter going everywhere!!! I backed the windows and doors with scrapbook paper and glued on the plywood figures I wanted to use. I'm excited about how it turned out .... even if it'll only be on display for a few more days before it's packed away until next year.

Until next time.....

Monday, October 25, 2010

ANOTHER QUICK HALLOWEEN IDEA...

This idea would make a really quick and cute Halloween Class Handout. I may make some for Boy Child to hand out to his classmates on Friday. I saw the box idea on a blog, but just decided to expand on the idea.


I made them by cutting a piece of green cardstock 81/2" x 41/2". I then scored the long sides 1" in from each side. Along the short side, I scored at 33/4" and 43/4". You'll see that the box then folds together quite easily. You'll need to snip both sides where the side and middle score lines cross (It really is easy, when it's in front of you). Glue the sides together and there you have it. Using my circle punches, I made his facial features and glued them in place. To make his hair, I cut a piece of black cardstock 3" x 21/2". Score at the 1" and 2" marks. Cut his jaggardy fringe along the front edge. I then punched 2 holes through the top and threaded some ribbon for the handle. Glue the back of the hair to the back of the box. Once I'd filled a cellophane bag with candy, I popped it into the box and attached the fringe side of the hair with 2 glue dots. There you have it - super easy and super cute!!!

This week I'll be preparing for a Pumpkin Carving and Pizza Party, that we're hosting for our Cub Scout Den and their families on Friday ..... what could be more fun - 18+ kids and masses of pumpkin guts!!! I'm planning on making the dessert table a dessert buffet .... think dead finger cookies, frankie pops, chocolate bones and skulls - yum, yum, yum!!!!

Have a fun week everyone.

Friday, October 22, 2010

A BIT OF THIS, A BIT OF THAT....

I thought I'd pop in with a few random items I've made over the past week. They've all been made for swaps I'm taking part in.

First - there have been many variations of these apothecary jars popping up all over blogland. I love the way they look, and decided that I had everything I'd need on hand, so why not give it a try .... This is the result ...


I really like the shape of this jar - it was a jar that had fruit in it, once upon a time. I so wish that I could find more of them. By only putting the Halloween rub on, on the one side of the jar, I thought that, once Halloween was over, the jar could just be turned around, and it would be clear glass. Add some ribbon, or perhaps some charms, and it could fit any occasion.

Remember the owl scissors keep? I begun thinking and wondering if it would be possible to somehow combine it with a pouch and/or needlecase, so that you could have an all in one, to take with you for any stitching you wanted to do while on the move. Ta Da .... this is what I came up with, and it certainly seems very functional.

This is the front of it - the owl scissor keep. Now, untie the ribbon ties, and this is what you'll find inside...

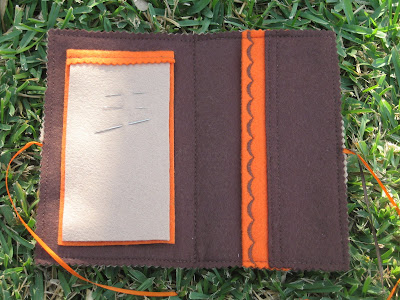
A pouch for storing your threads, or what ever you wish, and a needle book to keep all your pins and needles handy. I think I may make a few of these as Christmas gifts - maybe even think up some different scissor keeps for the front ..... Hmm, we'll have to see ....

Have a lovely weekend everyone. My boys (hubby and Boychild) are away camping this weekend with Scouts. Girlchild, her best friend and I will be getting down to some serious tye dying tomorrow - her choice, when I asked her if there was anything special she wanted to do!!!

Tuesday, October 19, 2010

HALLOWEEN CONTINUED ...

Yes, the lead up to Halloween continues in our house. It's a holiday I don't have many decorations for, but this year I've really enjoyed making a few items. Let me just say at this point, that until we arrived in the US almost 6 years ago, we had heard of Halloween, but had no idea that it was celebrated on such a grand scale.

First let me show you the third member of the Halloween Basket Club ..... the witch!!!


She turned out nicely, although not spooky at all, despite that pointed nose and wart on her cheek!!! I guess, I just don't do spooky well:-)
Next, I decided to give banner making a go (it was our October challenge in the YOE Swap). What a lot of fun that was. It's amazing what you can turn some felt, buttons and trim into if you think hard enough.
This was the first one I made ...

I loved how it turned out so much, that I went ahead and made another one....

Also super cute...
The banner bug has bitten, and I wont be stopping here - Christmas is just around the corner, and my head is buzzing with Christmas Banner ideas:-)
Thanks for stopping by - perhaps you may have been inspired to try something you've never done before. Give it a try - you just never know!!!

Wednesday, October 13, 2010

THE SEASONS, THEY ARE A CHANGING....

And I couldn't be happier!!!!
I love Fall ... the colors, the smells, the nip in the air .....it's all so yummy:-)

These will be part of my Fall mantle decorating (once the Halloween festivities are over) this year. I seem to be all about the pumpkins this year - every shape and size - they're all catching my eye.

These wooden blocks started their life out as wooden letter stamps in the clearance section of Hobby Lobby - their price tag ... 41c each!!! Bargin, so I snapped them up. After removing the letters, painting, drilling (thanks to my hubby here), mod podging, glittering and gluing, I have 4 adorable (at least I think they're adorable) wooden pumpkins!!!! They really couldn't have been easier to make.

I'm thinking that perhaps I need to see if they have anymore tucked away in the clearance section - I'm starting to see snowmen... Christmas houses .... hmm - I think I must dash off now!!!!

Until next time:-)

Tuesday, October 12, 2010

I WAS SPOILT....

I took part in The Fall Intigue Basket Swap, that was hosted by Michele (Something Special). The task at hand - fill a basket with some Fall goodness. It didn't have to all be handmade, but something handmade would be special.
My basket arrived on Friday from my sweet partner - Ruth. Everything was wrapped so beautifully and it was a real treasure to open. Ruth, you made my day - THANK YOU!!!

Here is a peek at all of my goodies...

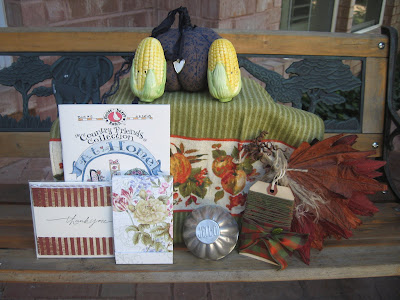
It was filled with Thank You cards, a notepad. The sweetest vintage Jello mold (my kids immediately requested Jello). See how cute those 2 ears of corn are ... they are salt and pepper shakers!!! The gem for me was the Gooseberry Patch booklet - I absolutely LOVE all things Gooseberry Patch:-) The Fall dish towel will look cute in my kitchen and the sweet pumpkin will take its rightful place on my mantel just as soon as the Halloween decor comes down.
Then there was the added bonus of all the tags, ribbon and rafia that Ruth used to wrap my goodies - all of it will be put to further good use.

Don't miss the lovely stamped fabric bag (full of acorns) or the cute straw broom!!!

Ruth, I'm sending you a big hug Thank You for spoiling me - I loved my basket full of Fall goodies ... you brought a smile to my day!!!

Wishing you all a lovely Fall day!!!!

Monday, October 11, 2010

HALLOWEEN CUTIES...

Those two words don't really sound right together do they? When I showed these little baskets to my hubby, his first question was "Are they mean't to be scary?". My reply "No". His reply "Oh good!!!". So now you understand where the title for this post came from:-)
Every Halloween we have a handful of kids that we like to give a little something extra too ..... family friends and the kids best friends. Given this is the year of "use what I have on hand", I took my crochet hook and some Halloween colored cotton yarn I had in my stash, and just got busy crocheting - this is what evolved. I am sure there are probably hundreds of tutorials for similar little baskets all over blogland and I'm sure these aren't an original idea, but they're what I came up with while "playing", and I'm very excited about how they turned out!!!! We'll fill them with some Halloween goodies and they'll be pretty cute gifts I think.

I thought I'd share how I made them with you - just incase anyone wanted to give it a try ...... they're really quick and easy. I found some purple yarn in the yarn bucket this evening, so I'm going to make a witch next.

Get Ready....

I used 100% cotton yarn and a D (3.25mm) crochet hook.

Felt and/or googly eyes

A little ribbon

Here Goes .....

With Jack O Lantern or Frankie colored yarn, make 2 chains (CH)

Row 1 - Single crochet (SC) 6 into the 1st CH (6 ST)

Row 2 - SC 2 in each SC around (12 ST)

Row 3 - SC 1, 2 SC in next SC, continue like this all the way around (18 ST)

Row 4 - SC 2, 2 SC in next SC, continue like this all the way around (24 ST)

Row 5 - SC 3, 2 SC in next SC, continue like this all the way around (30 ST)

Row 6 - SC 4, 2 SC in next SC, continue like this all the way around (36 ST)

Row 7 - SC 5, 2 SC in next SC, continue like this all the way around (42 ST)

Row 8 - SC 6, 2 SC in next SC, continue like this all the way around (48 ST)

Row 9 - SC 7, 2SC in next SC, continue like this all the way around (54 ST)

Row 10 - SC into the back loop of each SC (54 ST)

Rows 11 - 20 - SC 54 STS

Row 21 - 25 - Change yarn to green for Jack O Lantern or black for Frankie, and SC 54 STS.

At the end of Row 25 cut yarn and thread through loop to bind off. Weave in all the ends of your yarn.

To give them faces I cut circles from felt and just played around with their placement until I was happy, then I glued the pieces on .... It's really not an exact science (which makes them all the more fun). Both their mouths I embroidered with a piece of the black yarn.The ribbon handles are just lengths of ribbon pushed through to the wrong side of the basket and tied off to secure them - you can make them as long or short as you like. I prefered mine to be fairly small.

I'm linking this to Val's Spookify Me Saturdays over at Yarni Gras. If you haven't visited yet, you should as there are some really great Halloween ideas to see.

Until next time....

Sunday, October 3, 2010

HALLOWEEN IDEA...

The Halloween decorations came out on Thursday - not that I've finished putting it all together or decided on just what look I'm after, mind you!!!

I saw the idea for these ornaments in a magazine I was browsing through at the store the other day. I'm not sure which one it was, as I paged through a few. They were really simple to make, and I like the way they turned out .... especially the way they sparkle in the light.


Here is the quick "HOW TO" for these ornaments.....
You'll need -A pack of 2 inch round mirror tiles
-Orange glitter glue
- Some Halloween rub ons
- Thin ribbon for the loop
- Assorted beads for the dangly bit at the end
- Felt
- Glue
Next * Place the rub on onto your glass tile
* Apply glitter glue around the edge, and let dry preferably overnight
* Make you bead dangle
* Place glue on the back of your mirror tile and position the dangle & loop
* Place felt on the back
* Once dry, take pinking sheers and cut around the tile (be careful not to
cut your loop or dangle)
There you go, all done. As I said this is not my original idea, I just saw a picture of them in a magazine, and this is how I put mine together.
I am going to link this to Val over at Yarni Gras. She is showcasing a whole bunch of cool Halloween projects through out the month of October ..... hop on over and have a look - you won't be dissapointed:-)
Until next time - Happy Crafting!!!

Friday, October 1, 2010

A LITTLE SOMETHING TO SHARE ...

I love Betz White's patterns!!! I'm yet to try one that doesn't come together quickly and easily.I made this little leaf scissors keep and ladybug tape measure as part of a giveaway that I'm involved in.

I have made some of her other tape measure covers ..... the cupcake was super cute!!! Sadly I don't have a picture of that one.

This set was also one of her patterns - I have made the owl scissors keep a number of times:-)

Thursday, September 23, 2010

FALL .... WHERE ARE YOU?

I think she got lost along the way!!!
It is still blisteringly hot here ..... I honestly think it's time summer moved south and let Fall take up her rightful place:-)
To try and hurry her along, I've made a start on some Fall crafts. I mentioned in my last post that I was working on a Fall version of the spool dolls/mice ..... well here they are in all their pumpkiny goodness. (Oops, I see that I need to rewrap one of the trims!!!)


My favorite part of them - the little, green tendril (I think that's what it's called). That really turned them into pumpkins for me.

Next, I saw some cute Fall tassels on my last browse aroung Michaels. To me though, there were 2 issues with them - firstly, they were very bulky and not too well made and secondly, the price tag was a little steep.... $7-99 each. I was sure I could make something similar and more to my liking, and here's the result...

I picked up the scarecrow figurines at Walgreens - 2 for $1-00. The rest is stuff I had in my stash leftover from previous projects - wooden candle holders, brown paint, a teeny, tiny bit of trim and lots of different colored and textured ribbon. I like them a lot, and think that they'll look really cute hanging off of some door knobs or dresser drawer knobs during this Fall season.

Thanks for stopping by - I really appreciate it:-)
Until next time - enjoy the lovely Fall weather. That is if she has arrived in your neck of the woods!!!

Sunday, September 19, 2010

WHERE DOES THE TIME GO...

And it's not as if I haven't been busy!!!
Now that the kids are back at school and soccer season is in full swing, time is just running away with us. Add, having to buy a new computer, after the other one crashed, to that, and It explains my abscence.
I thought I'd share these little cuties with you....
Remember these little spool dolls I made back in April....

Well, here's my latest variation on them ....spool mice!!! I love how they turned out:-)

They have little leather ears and tails, the cutest bead noses, and whiskers too!!! I made them using the egg shaped wooden blanks you can buy at any of the craft stores. I made them up as I went along, and am so very happy with how they turned out.I'm busy working on a Fall themed variation of them, that I'll share with you once they're done.

My latest "car pool line" addiction is knitting cotton dishcloths!!! What a fun way to pass the 30 minutes you spend in that line each day - multiply that by 2 for me now that I have one child in Elementary and one at Middle School. They're so quick and easy to make, and the cotton yarn is a breeze to knit with. As soon as I have some pictures to post, I'll show you them.

Hope your Halloween and Fall crafting is keeping you busy ...... I haven't started mine yet, although I have so many ideas floating around in my head:-)

Until next time ..... Happy Crafting!!!