Tuesday, October 19, 2010

HALLOWEEN CONTINUED ...

Yes, the lead up to Halloween continues in our house. It's a holiday I don't have many decorations for, but this year I've really enjoyed making a few items. Let me just say at this point, that until we arrived in the US almost 6 years ago, we had heard of Halloween, but had no idea that it was celebrated on such a grand scale.

First let me show you the third member of the Halloween Basket Club ..... the witch!!!


She turned out nicely, although not spooky at all, despite that pointed nose and wart on her cheek!!! I guess, I just don't do spooky well:-)
Next, I decided to give banner making a go (it was our October challenge in the YOE Swap). What a lot of fun that was. It's amazing what you can turn some felt, buttons and trim into if you think hard enough.
This was the first one I made ...

I loved how it turned out so much, that I went ahead and made another one....

Also super cute...
The banner bug has bitten, and I wont be stopping here - Christmas is just around the corner, and my head is buzzing with Christmas Banner ideas:-)
Thanks for stopping by - perhaps you may have been inspired to try something you've never done before. Give it a try - you just never know!!!

Wednesday, October 13, 2010

THE SEASONS, THEY ARE A CHANGING....

And I couldn't be happier!!!!
I love Fall ... the colors, the smells, the nip in the air .....it's all so yummy:-)

These will be part of my Fall mantle decorating (once the Halloween festivities are over) this year. I seem to be all about the pumpkins this year - every shape and size - they're all catching my eye.

These wooden blocks started their life out as wooden letter stamps in the clearance section of Hobby Lobby - their price tag ... 41c each!!! Bargin, so I snapped them up. After removing the letters, painting, drilling (thanks to my hubby here), mod podging, glittering and gluing, I have 4 adorable (at least I think they're adorable) wooden pumpkins!!!! They really couldn't have been easier to make.

I'm thinking that perhaps I need to see if they have anymore tucked away in the clearance section - I'm starting to see snowmen... Christmas houses .... hmm - I think I must dash off now!!!!

Until next time:-)

Tuesday, October 12, 2010

I WAS SPOILT....

I took part in The Fall Intigue Basket Swap, that was hosted by Michele (Something Special). The task at hand - fill a basket with some Fall goodness. It didn't have to all be handmade, but something handmade would be special.
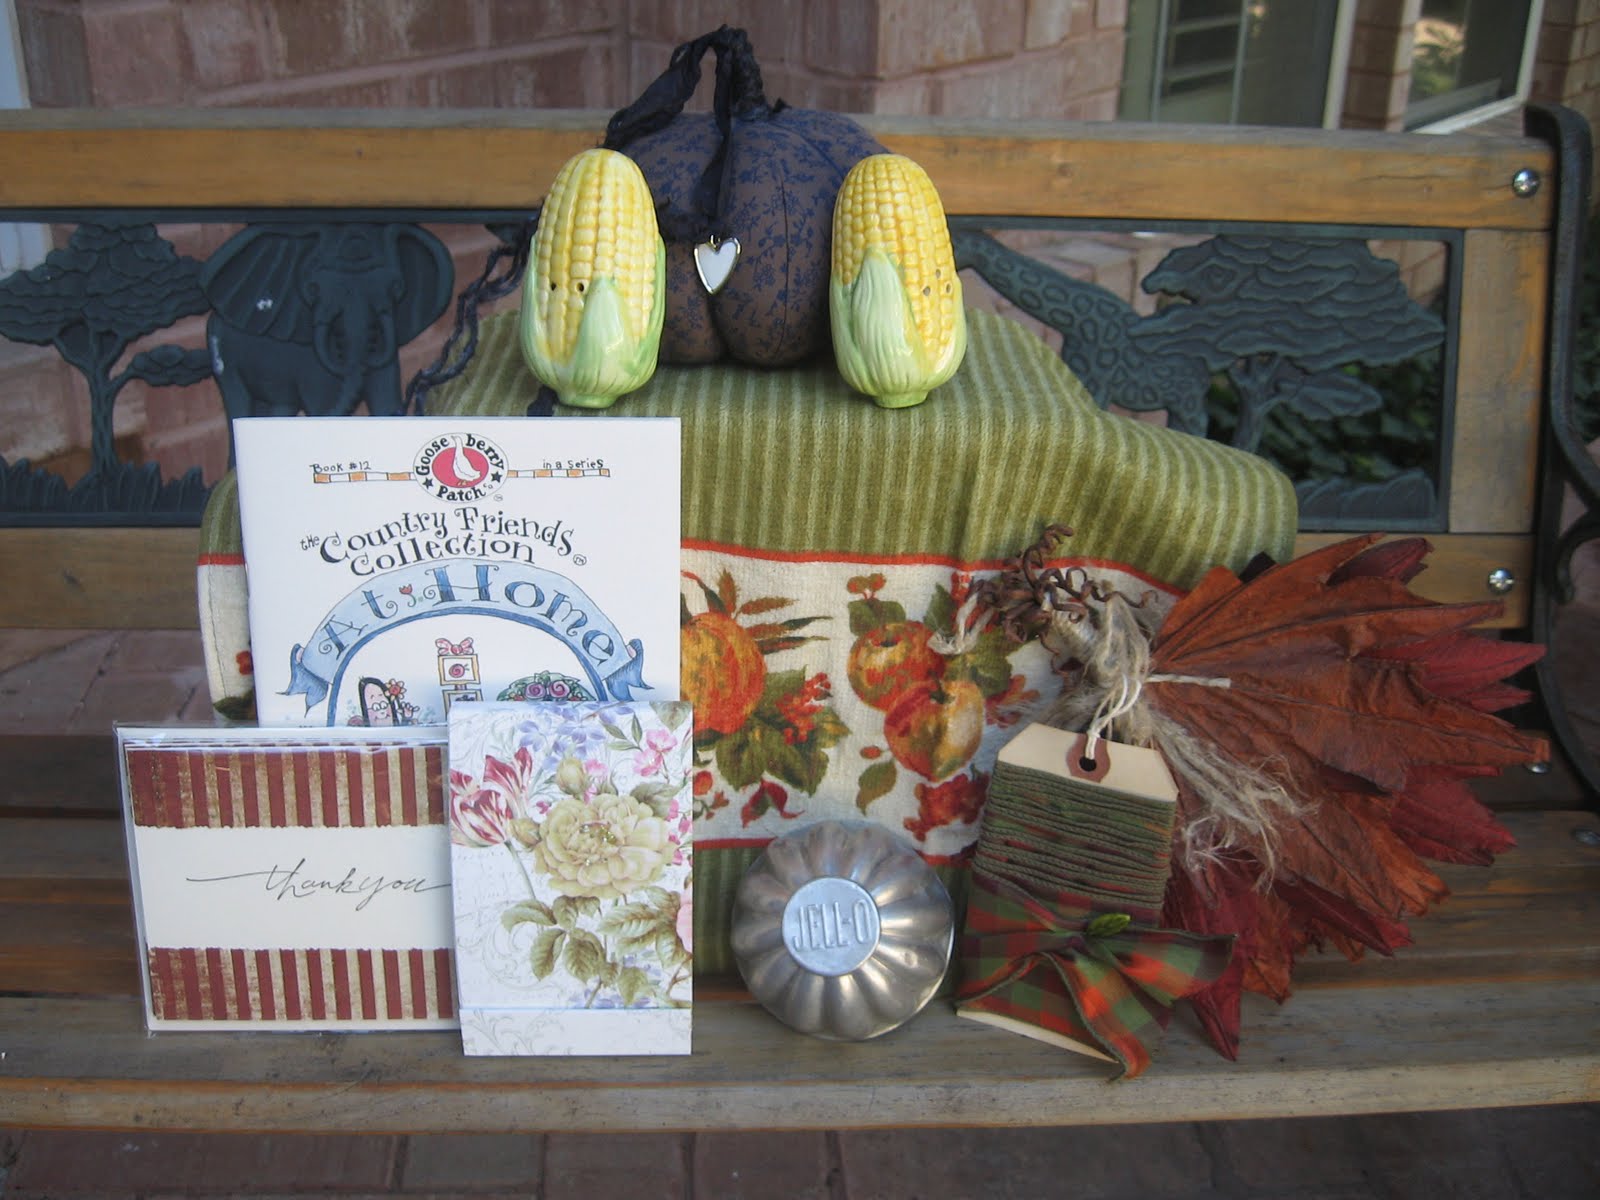
My basket arrived on Friday from my sweet partner - Ruth. Everything was wrapped so beautifully and it was a real treasure to open. Ruth, you made my day - THANK YOU!!!

Here is a peek at all of my goodies...

It was filled with Thank You cards, a notepad. The sweetest vintage Jello mold (my kids immediately requested Jello). See how cute those 2 ears of corn are ... they are salt and pepper shakers!!! The gem for me was the Gooseberry Patch booklet - I absolutely LOVE all things Gooseberry Patch:-) The Fall dish towel will look cute in my kitchen and the sweet pumpkin will take its rightful place on my mantel just as soon as the Halloween decor comes down.
Then there was the added bonus of all the tags, ribbon and rafia that Ruth used to wrap my goodies - all of it will be put to further good use.

Don't miss the lovely stamped fabric bag (full of acorns) or the cute straw broom!!!

Ruth, I'm sending you a big hug Thank You for spoiling me - I loved my basket full of Fall goodies ... you brought a smile to my day!!!

Wishing you all a lovely Fall day!!!!

Monday, October 11, 2010

HALLOWEEN CUTIES...

Those two words don't really sound right together do they? When I showed these little baskets to my hubby, his first question was "Are they mean't to be scary?". My reply "No". His reply "Oh good!!!". So now you understand where the title for this post came from:-)
Every Halloween we have a handful of kids that we like to give a little something extra too ..... family friends and the kids best friends. Given this is the year of "use what I have on hand", I took my crochet hook and some Halloween colored cotton yarn I had in my stash, and just got busy crocheting - this is what evolved. I am sure there are probably hundreds of tutorials for similar little baskets all over blogland and I'm sure these aren't an original idea, but they're what I came up with while "playing", and I'm very excited about how they turned out!!!! We'll fill them with some Halloween goodies and they'll be pretty cute gifts I think.

I thought I'd share how I made them with you - just incase anyone wanted to give it a try ...... they're really quick and easy. I found some purple yarn in the yarn bucket this evening, so I'm going to make a witch next.

Get Ready....

I used 100% cotton yarn and a D (3.25mm) crochet hook.

Felt and/or googly eyes

A little ribbon

Here Goes .....

With Jack O Lantern or Frankie colored yarn, make 2 chains (CH)

Row 1 - Single crochet (SC) 6 into the 1st CH (6 ST)

Row 2 - SC 2 in each SC around (12 ST)

Row 3 - SC 1, 2 SC in next SC, continue like this all the way around (18 ST)

Row 4 - SC 2, 2 SC in next SC, continue like this all the way around (24 ST)

Row 5 - SC 3, 2 SC in next SC, continue like this all the way around (30 ST)

Row 6 - SC 4, 2 SC in next SC, continue like this all the way around (36 ST)

Row 7 - SC 5, 2 SC in next SC, continue like this all the way around (42 ST)

Row 8 - SC 6, 2 SC in next SC, continue like this all the way around (48 ST)

Row 9 - SC 7, 2SC in next SC, continue like this all the way around (54 ST)

Row 10 - SC into the back loop of each SC (54 ST)

Rows 11 - 20 - SC 54 STS

Row 21 - 25 - Change yarn to green for Jack O Lantern or black for Frankie, and SC 54 STS.

At the end of Row 25 cut yarn and thread through loop to bind off. Weave in all the ends of your yarn.

To give them faces I cut circles from felt and just played around with their placement until I was happy, then I glued the pieces on .... It's really not an exact science (which makes them all the more fun). Both their mouths I embroidered with a piece of the black yarn.The ribbon handles are just lengths of ribbon pushed through to the wrong side of the basket and tied off to secure them - you can make them as long or short as you like. I prefered mine to be fairly small.

I'm linking this to Val's Spookify Me Saturdays over at Yarni Gras. If you haven't visited yet, you should as there are some really great Halloween ideas to see.

Until next time....

Sunday, October 3, 2010

HALLOWEEN IDEA...

The Halloween decorations came out on Thursday - not that I've finished putting it all together or decided on just what look I'm after, mind you!!!

I saw the idea for these ornaments in a magazine I was browsing through at the store the other day. I'm not sure which one it was, as I paged through a few. They were really simple to make, and I like the way they turned out .... especially the way they sparkle in the light.


Here is the quick "HOW TO" for these ornaments.....
You'll need -A pack of 2 inch round mirror tiles
-Orange glitter glue
- Some Halloween rub ons
- Thin ribbon for the loop
- Assorted beads for the dangly bit at the end
- Felt
- Glue
Next * Place the rub on onto your glass tile
* Apply glitter glue around the edge, and let dry preferably overnight
* Make you bead dangle
* Place glue on the back of your mirror tile and position the dangle & loop
* Place felt on the back
* Once dry, take pinking sheers and cut around the tile (be careful not to
cut your loop or dangle)
There you go, all done. As I said this is not my original idea, I just saw a picture of them in a magazine, and this is how I put mine together.
I am going to link this to Val over at Yarni Gras. She is showcasing a whole bunch of cool Halloween projects through out the month of October ..... hop on over and have a look - you won't be dissapointed:-)
Until next time - Happy Crafting!!!

Friday, October 1, 2010

A LITTLE SOMETHING TO SHARE ...

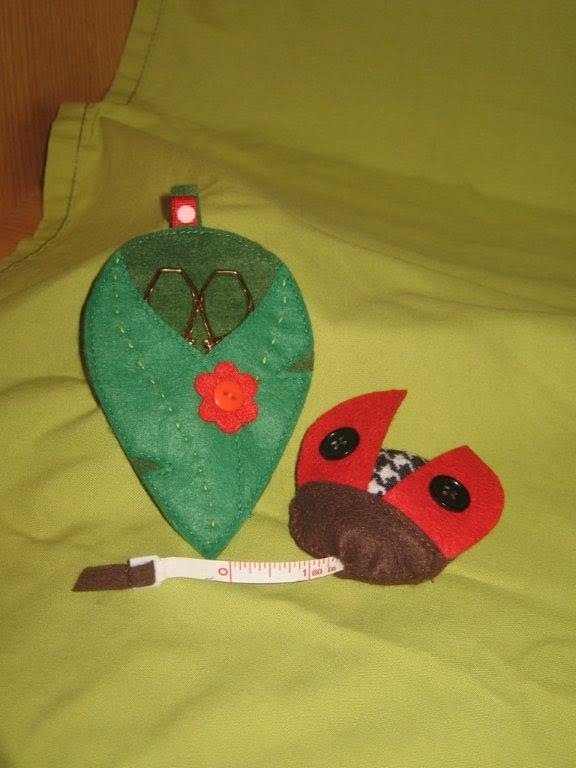
I love Betz White's patterns!!! I'm yet to try one that doesn't come together quickly and easily.I made this little leaf scissors keep and ladybug tape measure as part of a giveaway that I'm involved in.

I have made some of her other tape measure covers ..... the cupcake was super cute!!! Sadly I don't have a picture of that one.

This set was also one of her patterns - I have made the owl scissors keep a number of times:-)

Thursday, September 23, 2010

FALL .... WHERE ARE YOU?

I think she got lost along the way!!!
It is still blisteringly hot here ..... I honestly think it's time summer moved south and let Fall take up her rightful place:-)
To try and hurry her along, I've made a start on some Fall crafts. I mentioned in my last post that I was working on a Fall version of the spool dolls/mice ..... well here they are in all their pumpkiny goodness. (Oops, I see that I need to rewrap one of the trims!!!)


My favorite part of them - the little, green tendril (I think that's what it's called). That really turned them into pumpkins for me.

Next, I saw some cute Fall tassels on my last browse aroung Michaels. To me though, there were 2 issues with them - firstly, they were very bulky and not too well made and secondly, the price tag was a little steep.... $7-99 each. I was sure I could make something similar and more to my liking, and here's the result...

I picked up the scarecrow figurines at Walgreens - 2 for $1-00. The rest is stuff I had in my stash leftover from previous projects - wooden candle holders, brown paint, a teeny, tiny bit of trim and lots of different colored and textured ribbon. I like them a lot, and think that they'll look really cute hanging off of some door knobs or dresser drawer knobs during this Fall season.

Thanks for stopping by - I really appreciate it:-)
Until next time - enjoy the lovely Fall weather. That is if she has arrived in your neck of the woods!!!